2.7. Step 1: System Setup for Installing ROS2 Iron (Windows 10/11)#
2.8. Installing Chocolatey#
Firstly, we need to start by installing Chocolatey, a package manager for Windows.
Start by opening PowerShell with administrator priviliges. Select Yes if prompted to allow app to make changes to your device.

We need to check if Get-Execution Policy is not Restricted.
Run Get-ExecutionPolicy in your PowerShell terminal.
If it returns Restricted, then run Set-ExecutionPolicy AllSigned.
When prompted to change execution policy, simply input Y.
Now, paste the following code into your terminal and press enter.
Set-ExecutionPolicy Bypass -Scope Process -Force; [System.Net.ServicePointManager]::SecurityProtocol = [System.Net.ServicePointManager]::SecurityProtocol -bor 3072; iex ((New-Object System.Net.WebClient).DownloadString('https://community.chocolatey.org/install.ps1'))
Lots of text might fill up your screen now, don’t worry about it unless you see any errors.
Type choco to make sure everything worked out.

2.9. Install Python#
Open an administrator command prompt and type the following to install Python via Chocolatey
choco install -y python --version 3.8.3

2.10. Installing Visual C++ Redistributables#
Open a Command Prompt with administrator permissions. Select Yes if prompted to allow app to make changes to your device.

Run the following code to install what we need via Chocolatey
choco install -y vcredist2013 vcredist140
You should see a lot of green and white text, what’s important is that all 10 packages are shown as Installed at the bottom.


Now reload your Command Prompt by closing it at the top right and opening it again as shown earlier (with administrator privliges, of course).
2.11. Install OpenSSL#
Open a Command Prompt with administrator permissions and type in the following:
choco install -y openssl --version 1.1.1.2100
We need to run a command to set an environment variable that persists over sessions. Run the following:
setx /m OPENSSL_CONF "C:\Program Files\OpenSSL-Win64\bin\openssl.cfg"

We need to add the folder we just downloaded to your PATH in your System Environment.
Start by searching up Environment Variables in your search bar.

Click on the Environment Variables button boxed in red.

In the System Variables secton, find variable named Path, click on it, and then click Edit….

Now click New and paste this path in:
C:\Program Files\OpenSSL-Win64\bin\
When finished, click OK.

Click OK again.

Click OK once more.

2.12. Install Visual Studio#
Go to this link: Visual Studio and your download should automatically start.
When you run the installer, select to install Visual Studio Community. You should then come to a screen like this: Under Desktop and Mobile, select Desktop Development with C++  Make sure that ONLY the items with checkmarks are installed, as denoted by the red arrows in the image. Please ensure that no C++ CMake tools are to be installed.
2.13. Install OpenCV#
You can install OpenCV by downloading the zip file from this link: OpenCV
When you extract the file, make sure to extract it directly into your C:\ drive.
To do this, find the file you downloaded in your downloads folder, right click the folder, select Extract All, and then simply delete everything in the text bar up to **C:**. Then click Extract :


Next, open an Administrator Command Prompt, and enter the following command:
setx /m OpenCV_DIR C:\opencv
(Note: if you did not extract OpenCV directly into your C:\ drive, replace C:\opencv with your filepath)
Once again, go to your System Environment Variables, enter your “Path” again, and add a new path:
C:\opencv\x64\vc16\bin
And it should look like this, as denoted by the red arrow:

2.14. Install CMake#
First, open an Administrator Command Prompt, and run the command:
choco install -y cmake
Then, open your System Environment Variables again and add this to the Path:
C:\Program Files\CMake\bin
So that it should look like this:

Go to this link: Github Repo and install the following packages marked with red arrows:

These packages should have installed to your downloads folder. Find that folder and take note of the filepath. For example:

My path would be C:\Users\irock\Dropbox\PC (2)\Downloads
Open your Admin Command Prompt, and enter the command:
choco install -y -s <PATH\TO\DOWNLOADS\> asio cunit eigen tinyxml-usestl tinyxml2 bullet
But instead of <PATH\TO\DOWNLOADS>, replace it with your own dowloads path. For example, mine would be:
choco install -y -s C:\Users\irock\Dropbox\PC (2)\Downloads asio cunit eigen tinyxml-usestl tinyxml2 bullet
2.15. Install Misc. Dependencies#
Within an Admin Command Prompt, run the commands:
python -m pip install -U pip setuptools==59.6.0
python -m pip install -U catkin_pkg cryptography empy importlib-metadata jsonschema lark==1.1.1 lxml matplotlib netifaces numpy opencv-python PyQt5 pillow psutil pycairo pydot pyparsing==2.4.7 pyyaml rosdistro
Then, go to this link to install xmllint and extract the folder directly into your C:\ drive by removing everything from the directory address except for C:, such that it looks like this:

Again, go to your System Environment Variables and add this to the Path:
C:\xmllint\bin
So that it should look like this:

2.16. Install Qt5#
Install the Qt5 installer we need by clicking on this link https://download.qt.io/archive/qt/5.12/5.12.12/qt-opensource-windows-x86-5.12.12.exe
This will probably take a while
Go to your downloads file and open the installer.
First, make an account if you don’t have one already by clicking Sign Up. This isn’t too long of a process, but will require email verification. Once done, return to the installer and login with the account you just created.

Next, check both of these boxes and click Next.

Click Next again.

Accept the default directory where it wants to be installed.

At this window, select the dropdown arrow for Qt 5.12.12, and select MSVC 2017 64-bit. Then click Next.


On the next section titled License Agreement, agree to the terms and conditions.
On the next section titled Start Menu Shortcuts, just select Next.
On the next section titled Ready to Install, click Install.
When that’s done, uncheck the Lanch Qt Creator checkbox and click Finish.
Now that that’s done, open a admin command prompt and set these variables.
setx /m Qt5_DIR C:\Qt\Qt5.12.12\5.12.12\msvc2017_64
setx /m QT_QPA_PLATFORM_PLUGIN_PATH C:\Qt\Qt5.12.12\5.12.12\msvc2017_64\plugins\platforms

2.17. RQt Dependencies#
Download this Ghaphviz launcher at this link: api/v4/projects/4207231/packages/generic/graphviz-releases/9.0.0/windows_10_cmake_Release_graphviz-install-9.0.0-win64.exe
Open when done.
At this page, click Next.

At this page click I agree.

At this page, select the middle selection. Then click Next.

When choosing the install location, just select the default.

On the next page, just click Next again, and finally click Install. Lastly, click Finish

2.18. Install ROS 2#
Visit this GitHub Repo ros2/ros2 and find the latest ROS 2 Iron Irwini download.
As you can see below, the latest install is Release 3, this may be different for you, as you may be from the future where there is a newer release. In any case, what is important is that you select the ros2-iron-#####-windows-release-amd64.zip

After you’ve click on that download, we need to unzip that file. As we did before, find the file in your downloads folder, then right on it and select Extract All. Extract the files into this destinaton:
C:\dev\ros2_iron

2.19. Setup Environment#
Open a new command prompt and source the ROS 2 setup file.
call C:\dev\ros2_iron\ros2-windows\local_setup.bat
You might see a warning message, but it’s safe to ignore it.

2.20. Try some examples#
Open a new command prompt and set up the ROS 2 environment as we did above.
call C:\dev\ros2_iron\ros2-windows\local_setup.bat
This command prompt will be our talker. Run this command next
ros2 run demo_nodes_cpp talker
Now, let’s set up our listener. Open a new command prompt and set up the ROS 2 environment again. Then run this command ```ros2 run demo_nodes_py listener

Congrats! You’ve successfully set up your RO2!
2.21. Step 2: Using Python Turtle#
2.22. Install Turtlesim#
Before anything, ensure that you have setup your ROS environment. Run the following line in your command prompt:
call C:\dev\ros2_iron\ros2-windows\local_setup.bat
Check that the turtlesim package is installed:
ros2 pkg executables turtlesim
This is what should be returned:

2.23. Start Turtlesim#
Enter the following command in your command prompt:
ros2 run turtlesim turtlesim_node
If you are asked for permissions, click “Allow”.
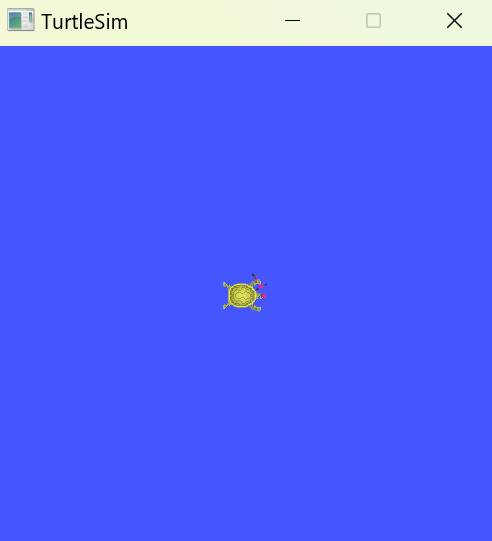
You should then see a small pop-up with a singular turtle in the middle, like this:
Also check that your terminal is returning the following messages:

These messages display the name and coordinates of the turtle. In this case, the name of the turtle is “turtle1”.
2.24. Using Turtlesim for Basic Moving and Rotating#
While keeping your previous command prompt open, open another command prompt and enter the ROS environment once again. As a reminder the code to enter the ROS environment is:
call C:\dev\ros2_iron\ros2-windows\local_setup.bat
In that new command prompt, type:
ros2 run turtlesim turtle_teleop_key
Once again, if you are asked for permissions click “Allow”. The new terminal will display the following message:

On your keyboard, the up arrow moves the turtle in whatever direction it’s facing. The down arrows moves the turtle in the opposite direction it’s facing.
If you look at your keyboard, you might notice that the letter keys displayed in your command prompt (and in the image above) follow a square shape. This is a good point of reference as to which keys correspond to which direction they make the turtle face. The left and right arrow keys also rotate the turtle, but the degrees rotated every time is incredibly arbitrary.
One additional thing to note is that to actually move the turtle around, you need to be tabbed into the command prompt with the move instructions displayed (i.e. the new command prompt you should have just made).
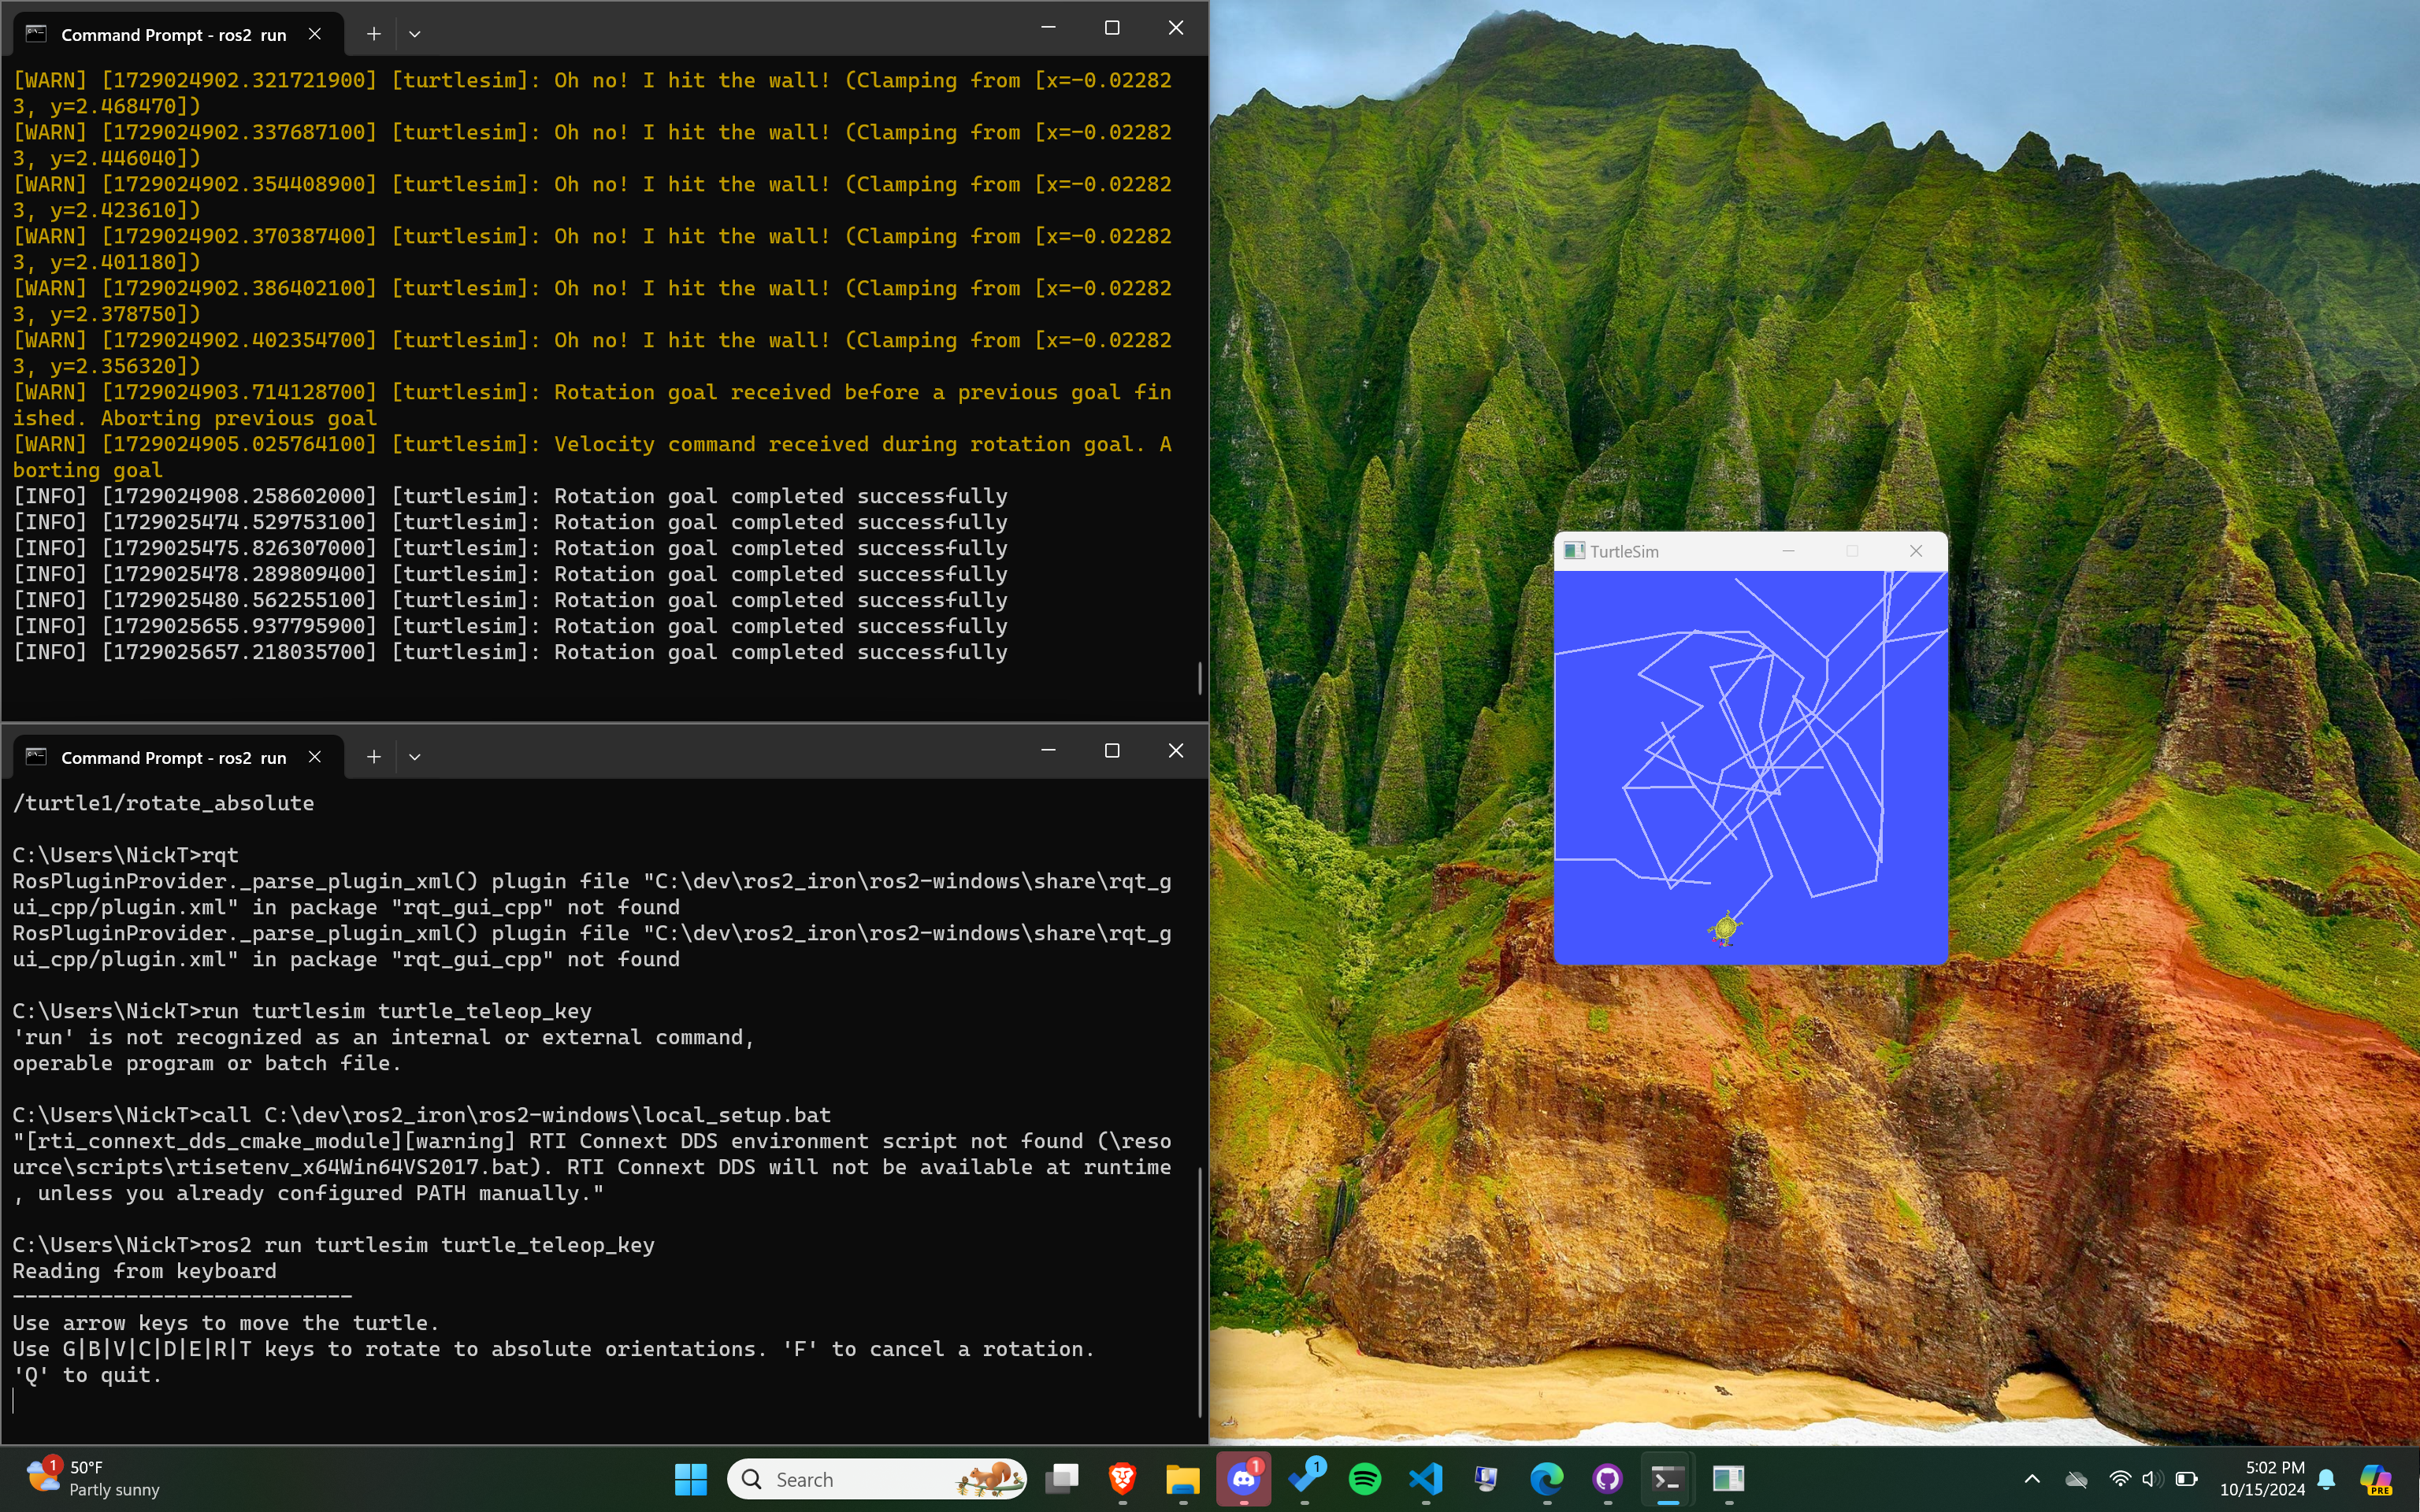
So, the entire system should look something like this. The top terminal is the listener, and the bottom terminal is the talker.
2.25. Installing and Using RQT#
If you happened to be playing around with turtlesim for a bit, press Q to quit out of the keyboard reading loop in whichever command prompt window you were using for moving the turtle (aka your “talker terminal”).
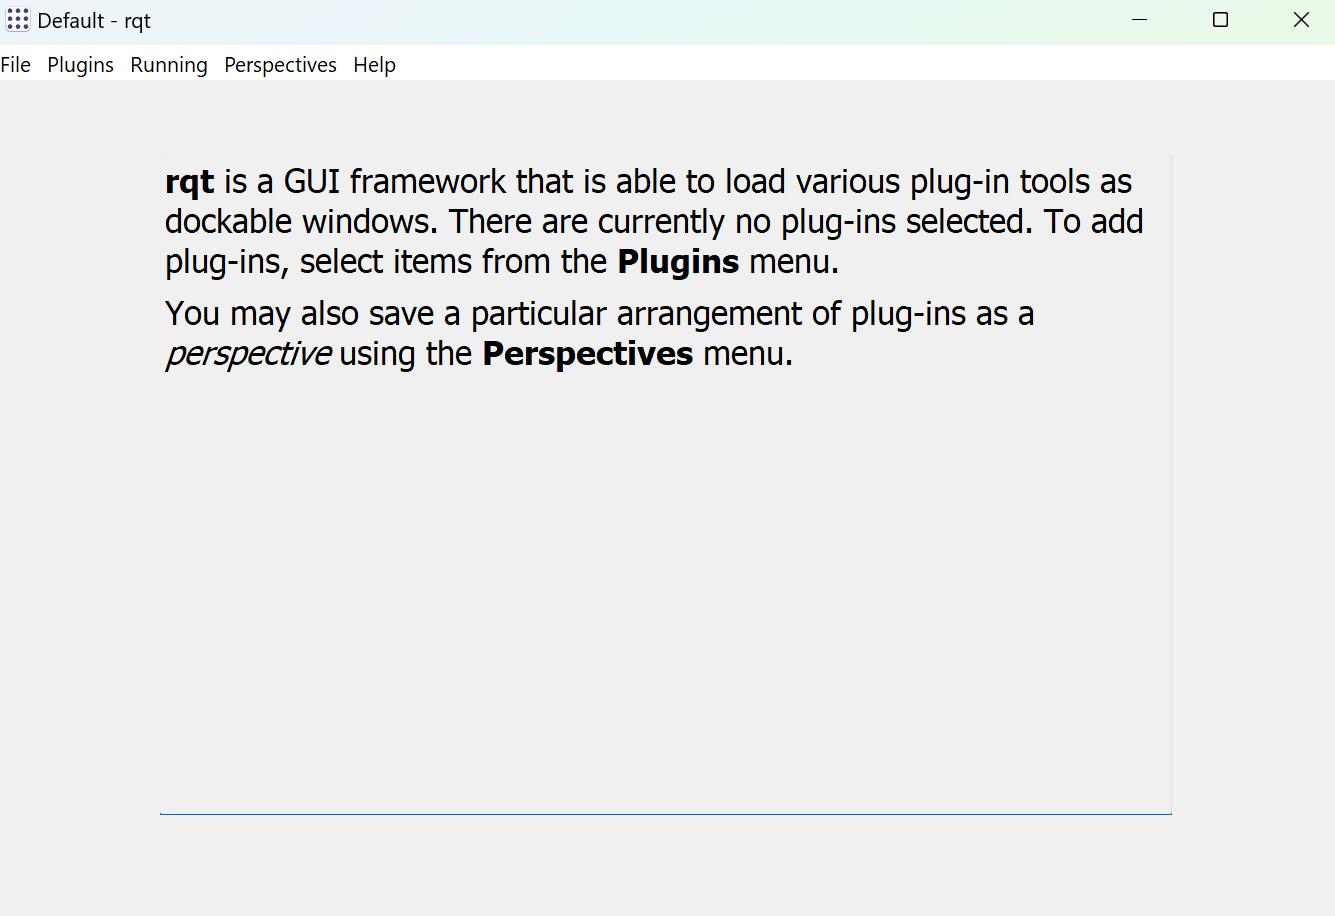
Now we will run rqt. You should already have it installed, so in your talker terminal run:
rqt
If you are asked for permissions, click “Allow”. You should see this window show up:
On your first time running it, rqt should be empty. On the top left bar, go Plugins > Services > Service Caller. You should have:
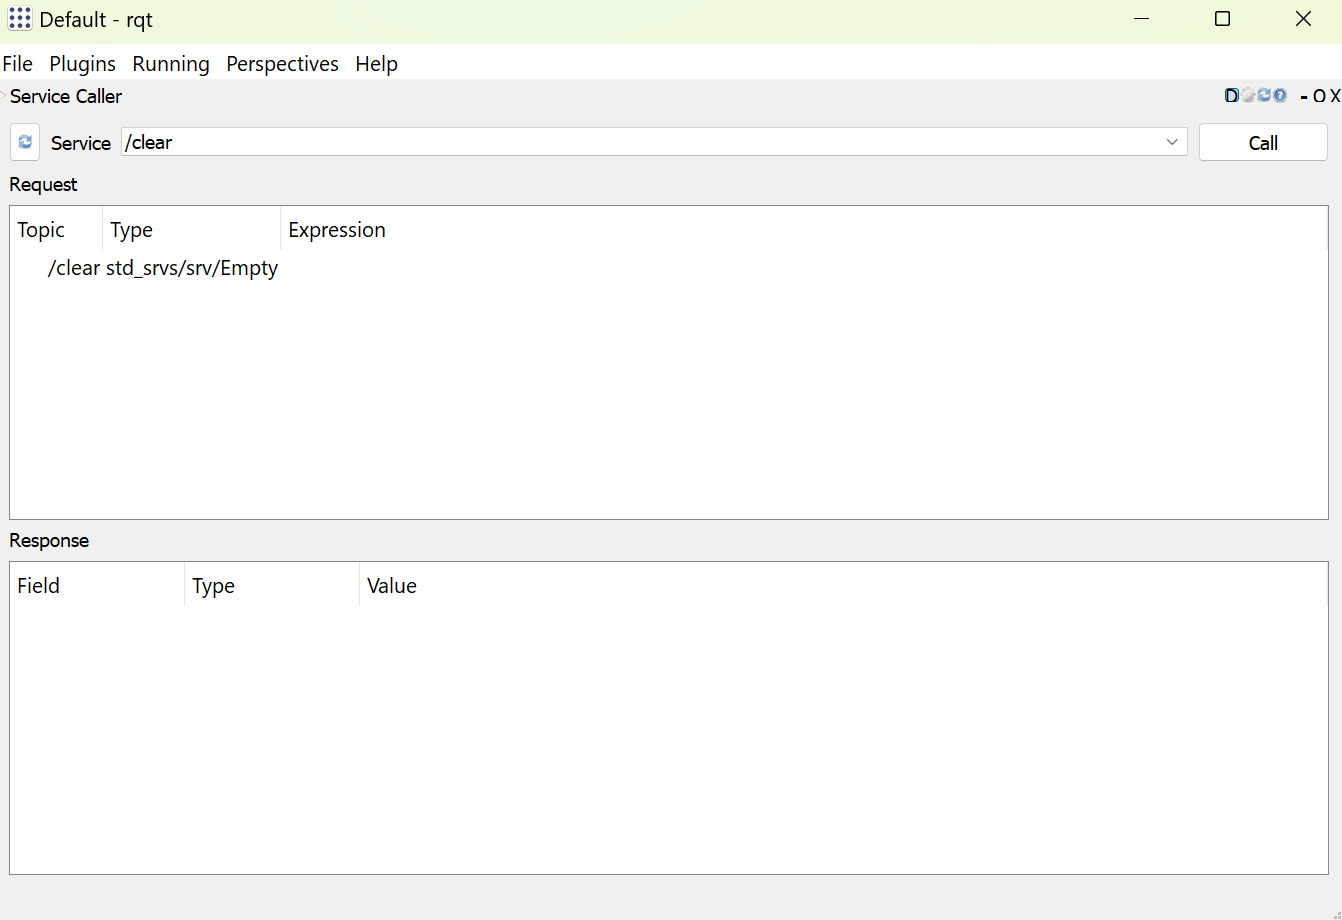
Click the refresh button near the top left to make sure all the turtlesim services are available.
2.26. Spawning In Turtles#
In rqt, click the bar dropdown marked “Service” and find /spawn. Click on it, and your rqt should look like this:
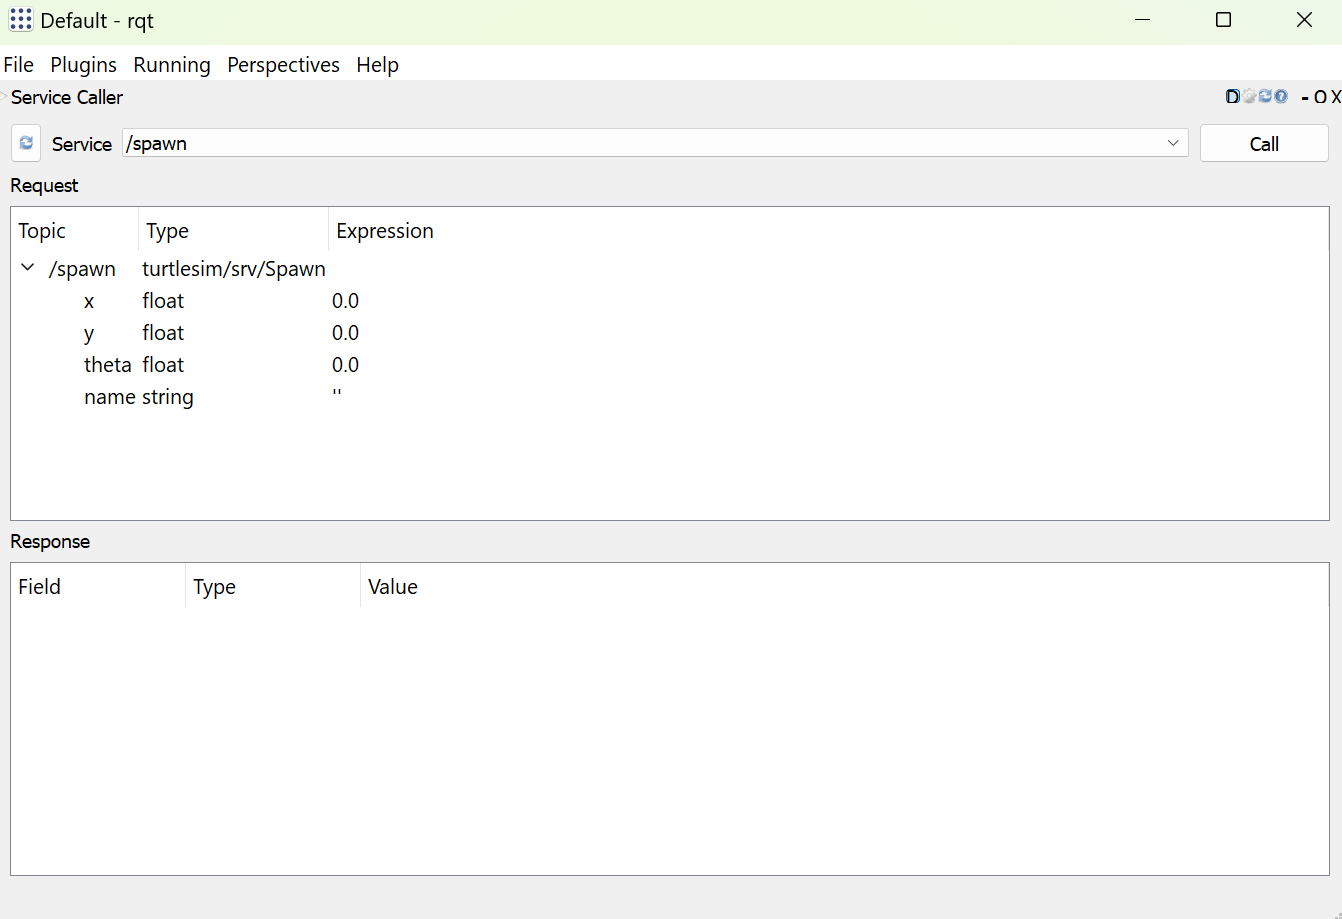
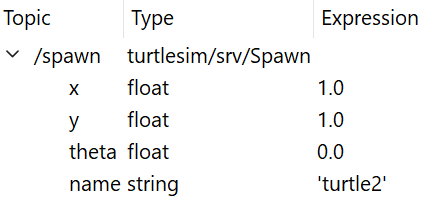
This service spawns a new turtle. Under the expression column, you can change the name and coordinates of this new turtle by double-clicking and typing. Try naming your new turtle “turtle2” and giving x and y coordinates (1.0, 1.0).
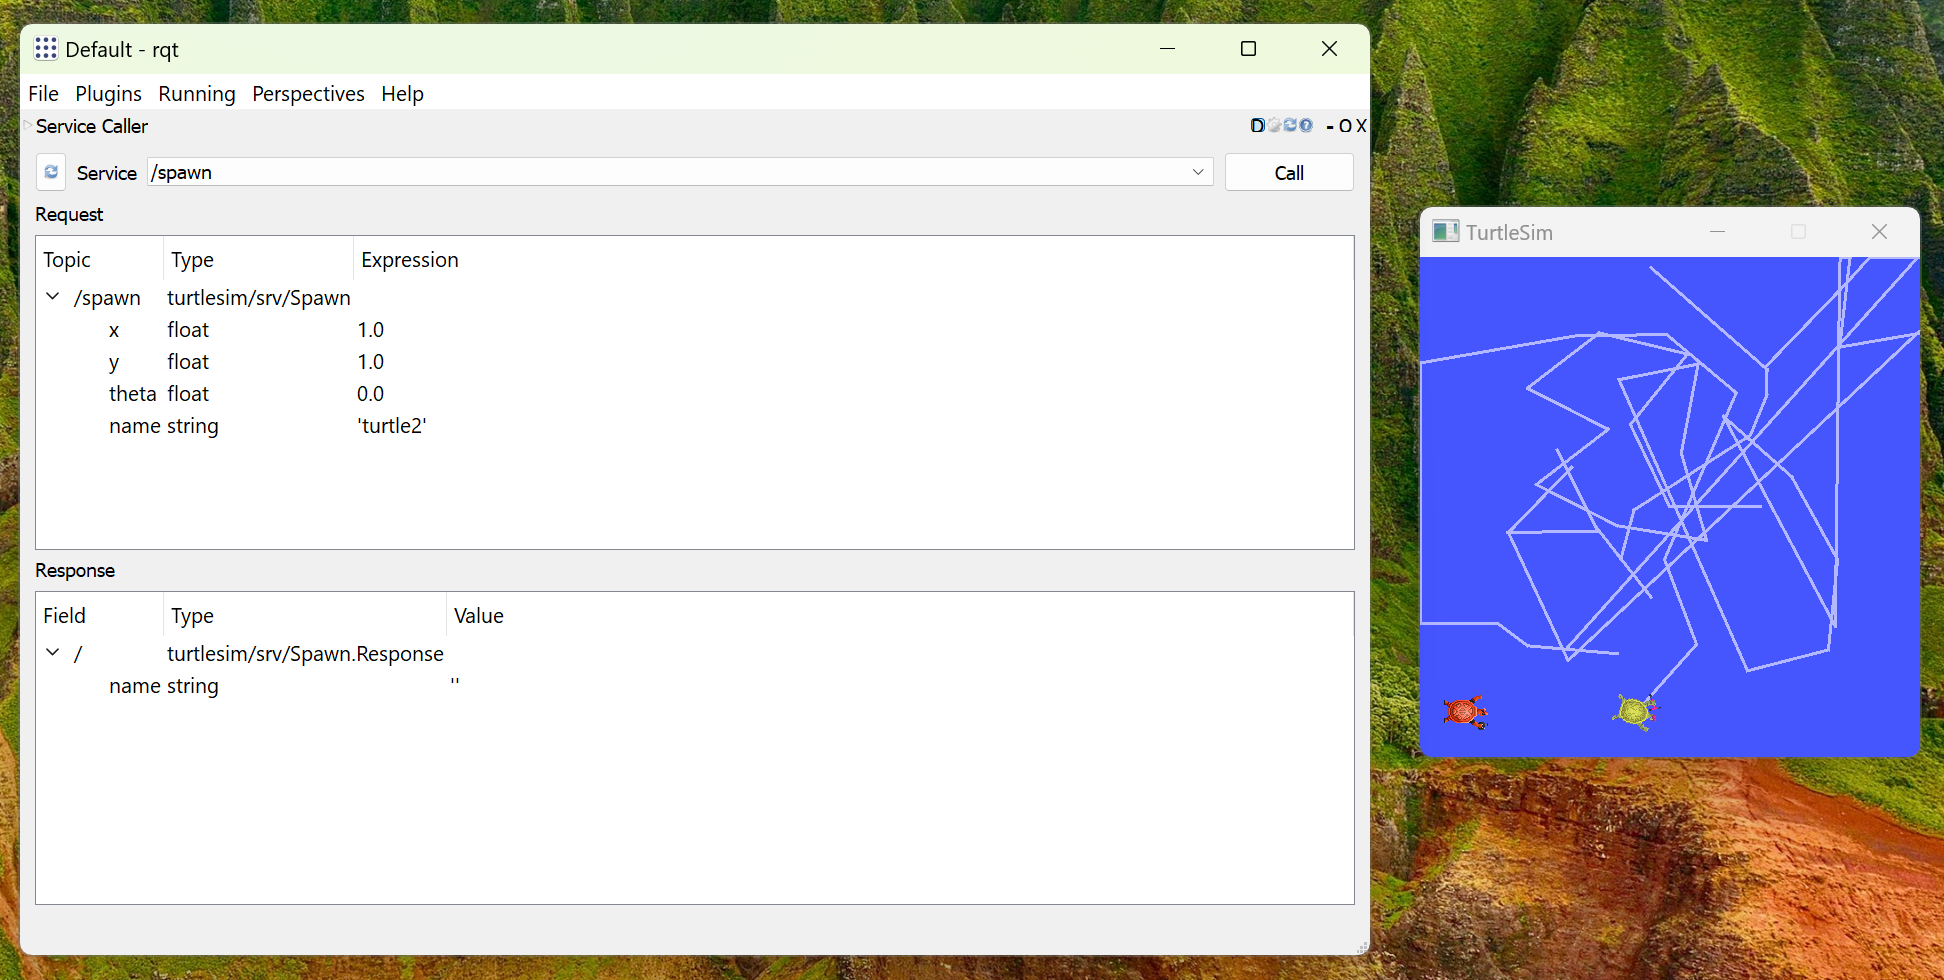
To make your new turtle appear, click the button marked “Call” at the top right of the rqt window. These are the contents of rqt and turtlesim after pressing this button:
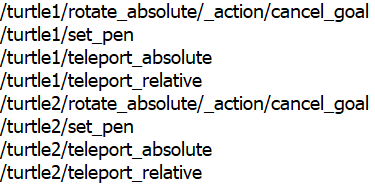
If you click the refresh button again and go to the Service dropdown, you can see there are now services for both turtle1 and turtle2.
2.27. Changing Pen Color#
Going into the Service dropdown bar, select /turtle1/set_pen
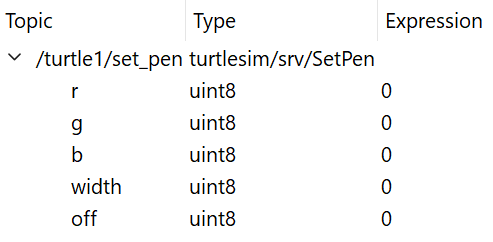
The r, g, b categories change the color of turtle1’s pen (trail), and width changes the width of turtle1’s pen. Change r to 255 and width to 5. To be able to move turtle1 again, run turtle_teleop_key in an additional command prompt while in the ROS2 enrivonment. See its effects on turtle1!
2.28. Moving Other Turtles#
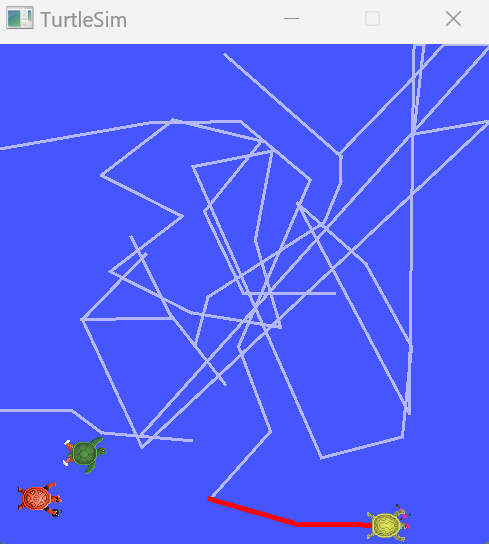
Notice how we can’t move turtle2 around. We need another talker terminal to be able to do this. Open a new command prompt in the ROS environment and run:
ros2 run turtlesim turtle_teleop_key --ros-args --remap turtle1/cmd_vel:=turtle2/cmd_vel
This command remaps the arrow key controls to work for the second turtle. If your turtles aren’t moving immediately, make sure you’re tabbed into the command prompts running turtle_teleop_key for turtle1 and turtle2 respectively.
Side note: You’re still able to move turtle1 with the arrow keys and absolute rotation. But if you’re tabbed into turtle2’s teleop command prompt, you can only move turtle2 with arrow keys and the absolute rotation is still assigned to turtle1.
2.29. Closing Turtlesim#
To exit out of turtlesim properly, type Ctrl+C in the command prompt running turtlesim_node, Q on any command prompts running teleop_key, and just exit out of RQT normally (i.e. using the red X button on the top right as you would with any other tab).